Pointo: RTS Blueprints
Introduction
First of all, I would like to personally thank you for trying out this asset!
What is Pointo?
Pointo is a super simple Starter Kit for Real Time Strategy (RTS) games. Why is it simple? Because every game has their own needs. You can see Pointo as a Blueprint that will help with some basic mechanics for RTS games, such as selecting Units and move them around to collect different resources. It also has a camera script specially made for RTS games. It is based on Scriptable Objects so one can extend the features and make a more tailored experience for your specific game.
Start using Pointo
Floor
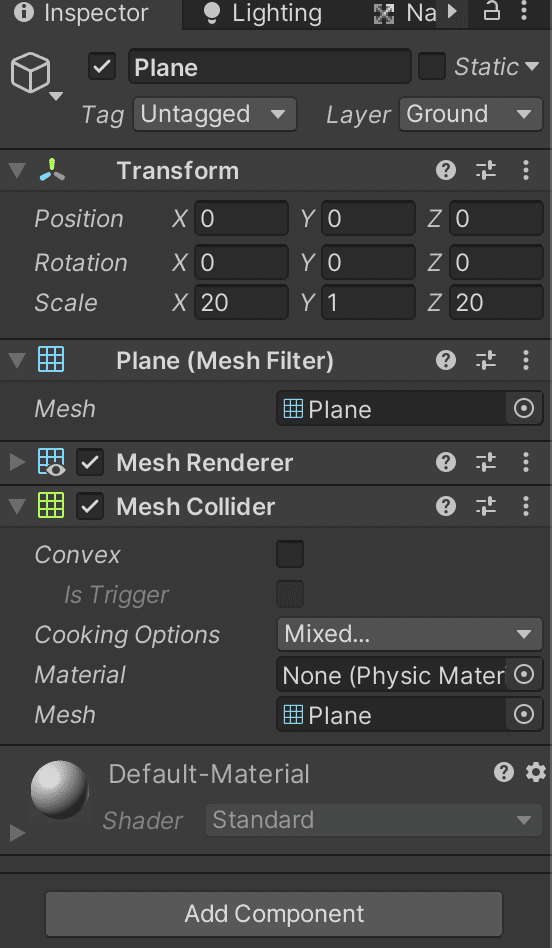
Once the Project Settings are done, you can start preparing your project. Start by adding a 3D model (we recommend a Plane or a Cube) to act as a floor. Make sure this new object has a collider attached to it and if it has a Rigidbody make sure to set it to “isKinematic” since it doesn’t move and we don’t want gravity on it.
Make sure that this new object has the layer “Ground”
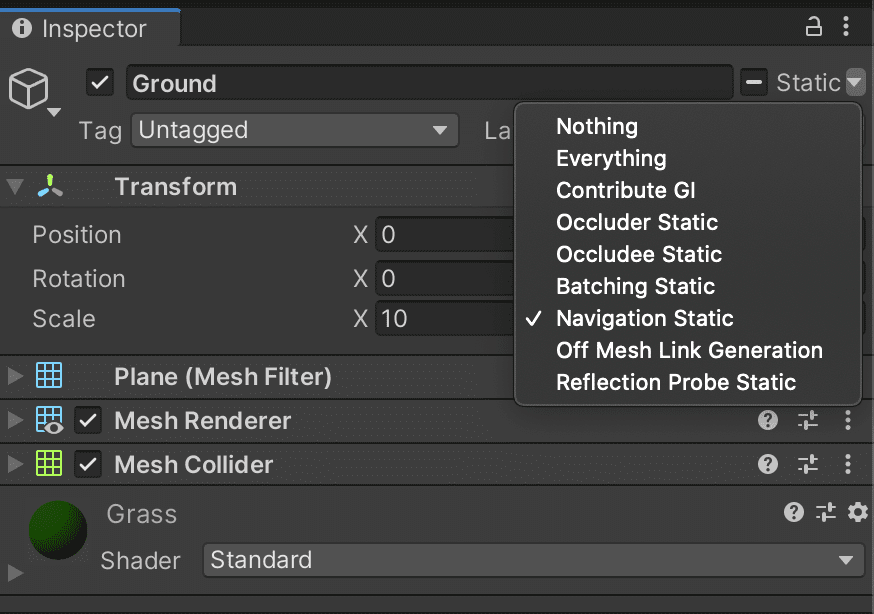
Finally mark the ground as Navigation static.
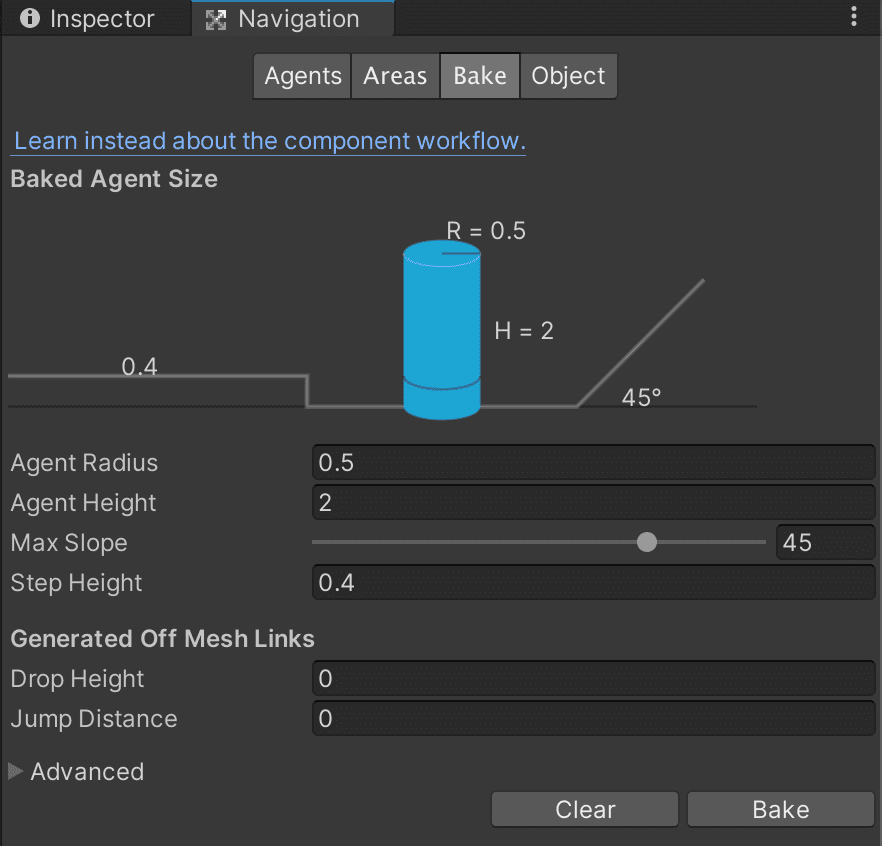
Go to Window -> AI -> Navigation and Bake your scene
Pointo Controller
Create an Empty GameObject and attach the PointoController script to it (or use the prefab if you want).
In the script you can set different values for different attributes. Here is a picture of the standard configuration:
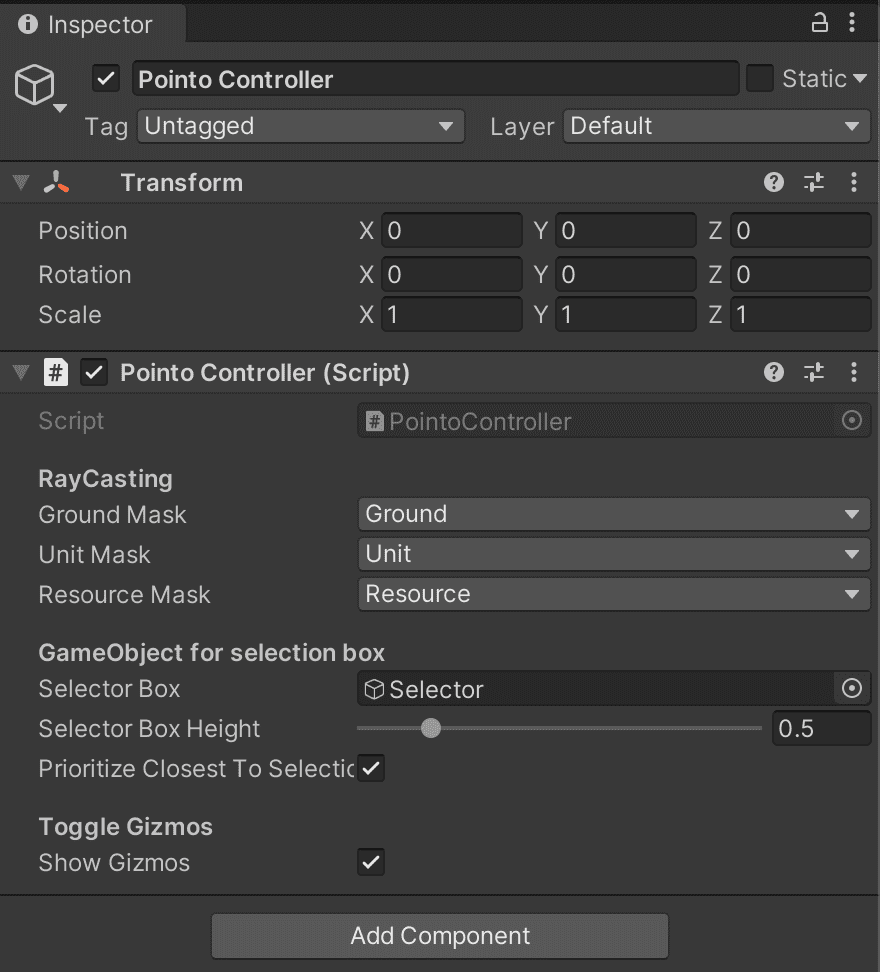
RayCasting
- Ground Mask: is the LayerMask used for the ground/floor on your scene. Make sure to set it so whenever you left/right click it will detect the surface and can act accordingly.
- Unit Mask: is the LayerMask you define for your units to be on. It’s used to detect whenever you clicked on Unit type GameObject
- Targets Mask: is the LayerMask you define for your right click interactions: usually Resources and Units to be on. It’s used to detect whenever what has been right clicked to act accordingly (for example if it’s a Unit, we attack it)
GameObject for selection box
This section handles the UI display box when dragging the mouse.
- Selector Box: One needs to use an empty GameObject with only a MeshRenderer attached to it. This way we use the MeshRenderer visuals when adjusting the scale and position when dragging.
- Selector Box Height: the height of the box when displaying.
- Prioritize Closest to Selection: if set to true when selecting the Units it will prioritize the closest type of Unit to the center and only select that type of Unit. If set to false it will select the first Unit and select everything of that Unit type.
Toggle Gizmos
Only for debug purposes. To see the different parts of the PointoController in action, you can toggle on or off this feature
Creating a new Unit Configuration
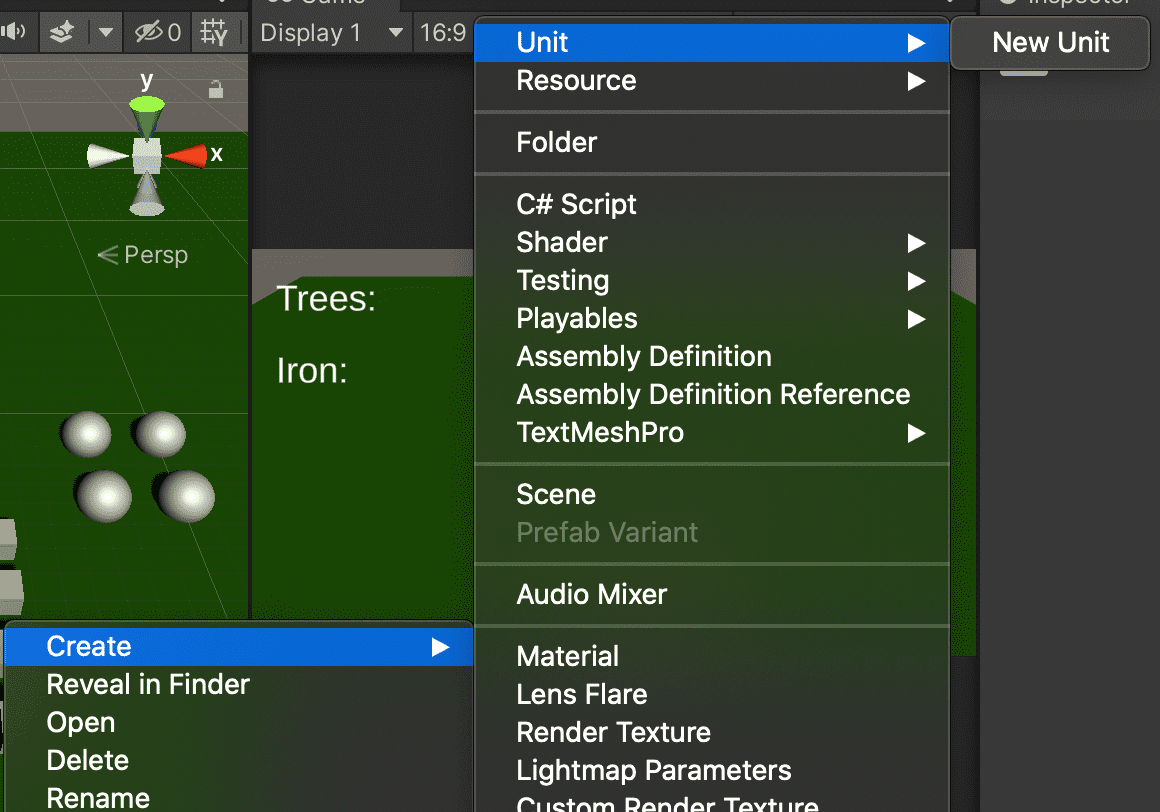
To create a new Unit configuration just right click on your project. Go to Create -> Unit -> New Unit. Your new Scriptable Object with a Unit data is created. Name it however you want and start setting the stats for it.
Creating a new Resource Configuration
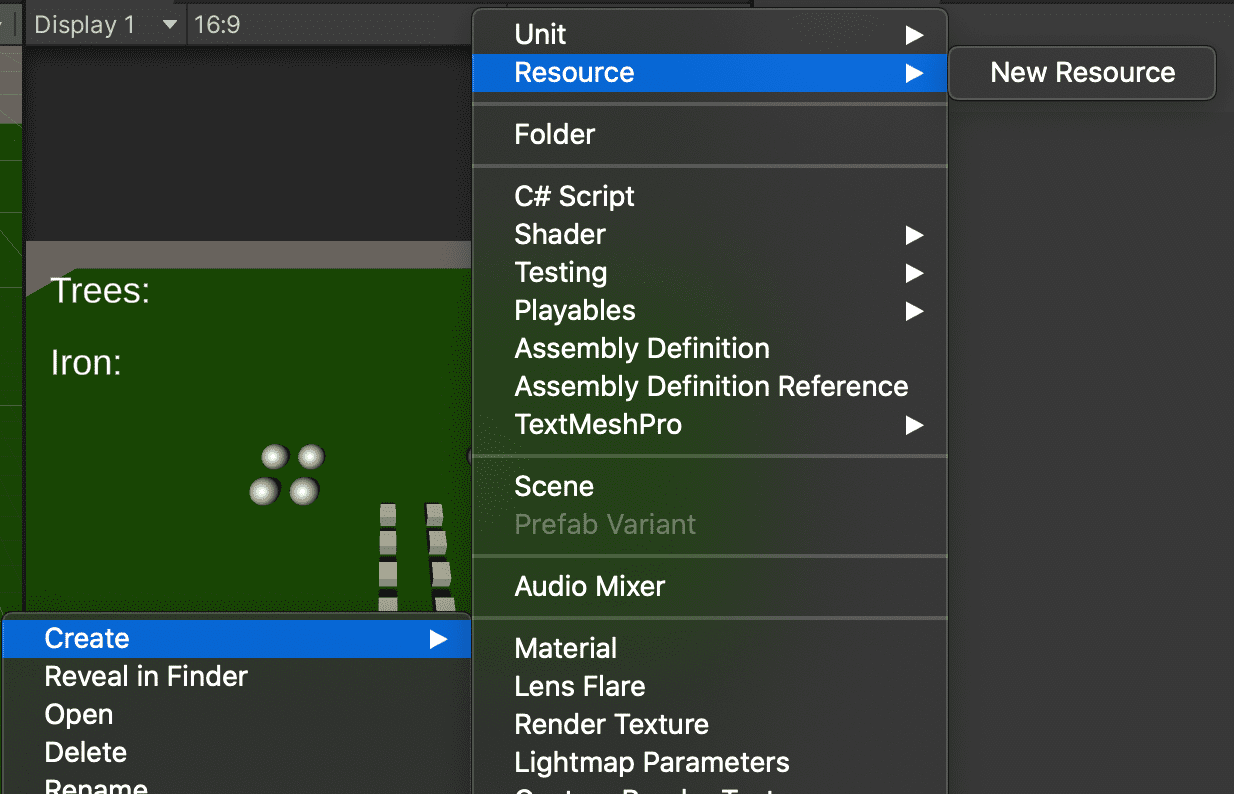
Same as the previous section of Creating a new Unit Configuration. Go to Create -> Resource -> New Resource. Your new Scriptable Object with a Resource data is created. Name it however you want and start setting the stats for it.
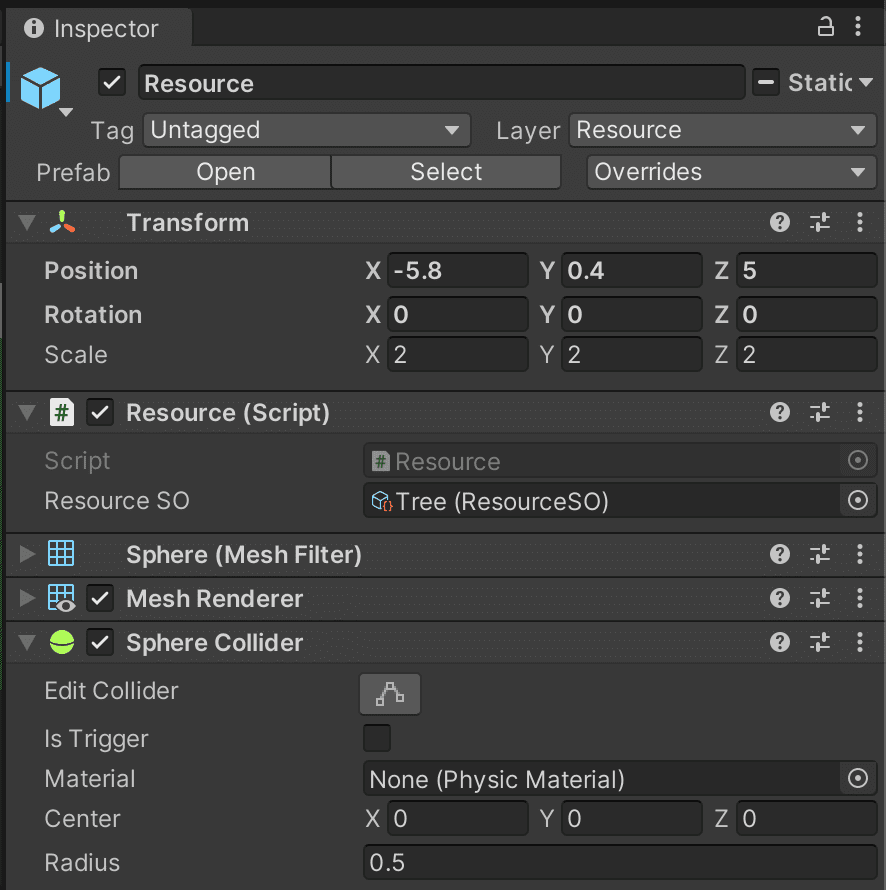
Resource
The script needs a Resource Configuration on it. Be sure of also adding the specific LayerMask used in the PointoController script under the RayCasting section.
Unit
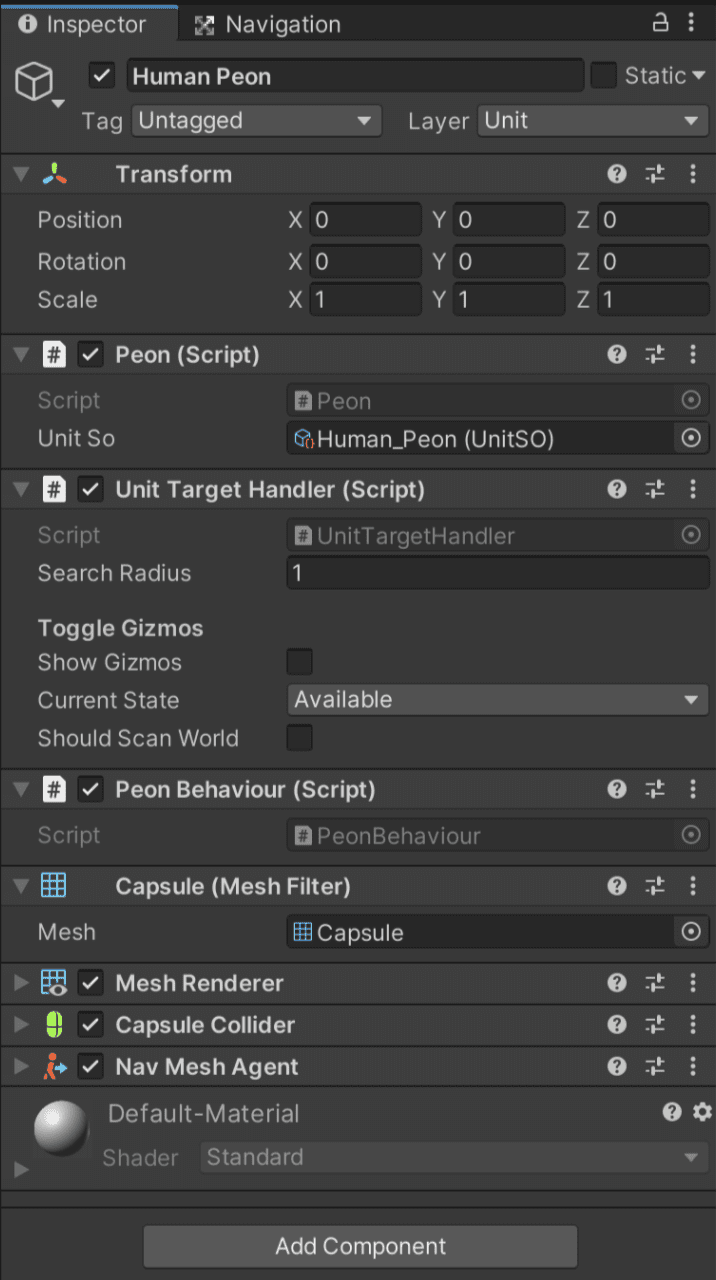
To add a Unit to the scene you:
- Create an empty GameObject. Make sure to change the LayerMask to the one associated with the PointoController under the RayCasting section.
- Add an empty child to this GameObject and call it Selector
- Add a Mesh Renderer (or any Renderer. It’s to show a UI when the Unit is selected) and also add a Mesh Collider to it (again, any type of Collider).
- Then add the specific script under the Unit -> Types folder: either a Knight, Peon or you can create any class script here.
- This will automatically add a NavMeshAgent, a Unit Target Handler and a specific Behaviour script. You can tweak the values to adjust some configurations.
- Use one of the Unit Configuration assets created before to attach to step 4.
So now press the Play Button and you can start playing around. If one presses the G button on your keyboard, all Units will be back to the starting point.
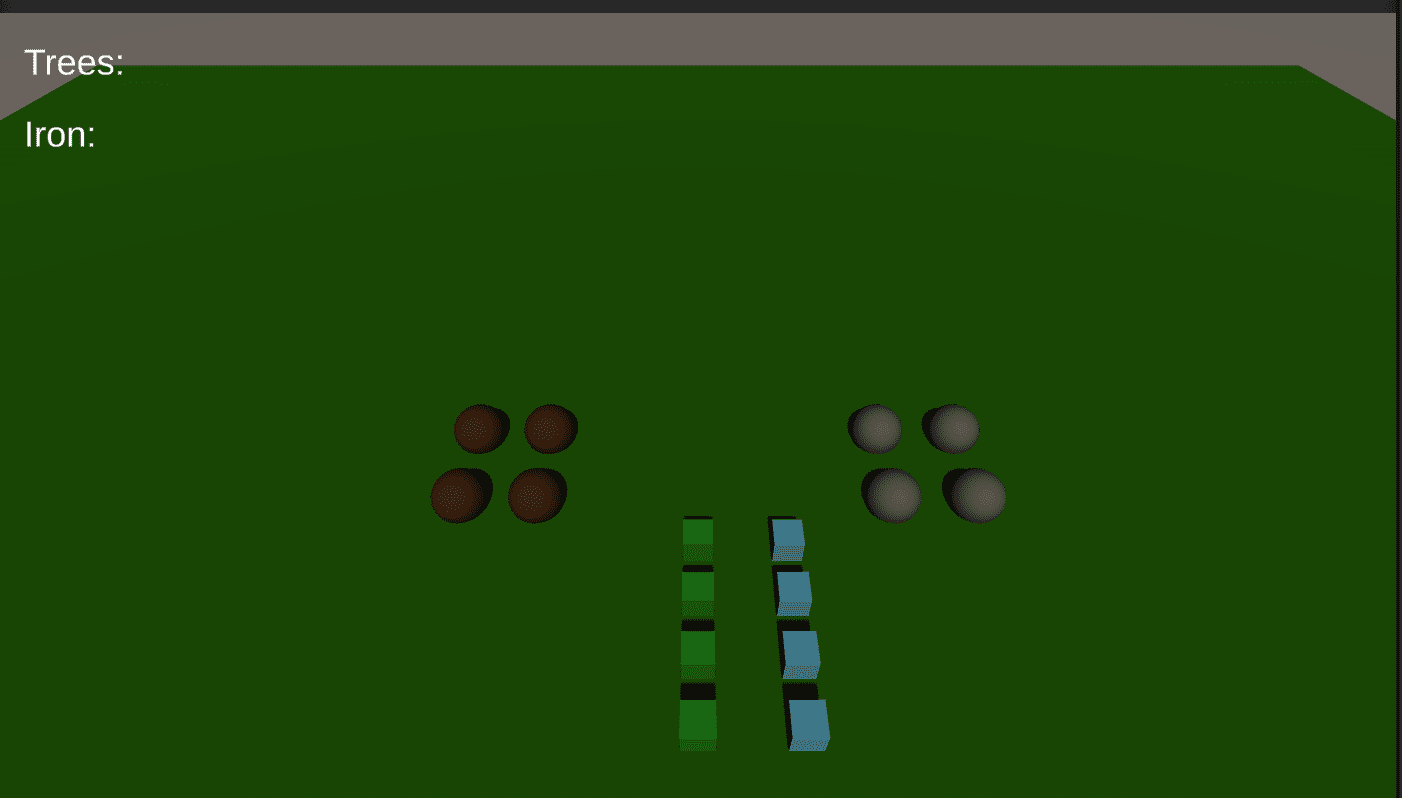
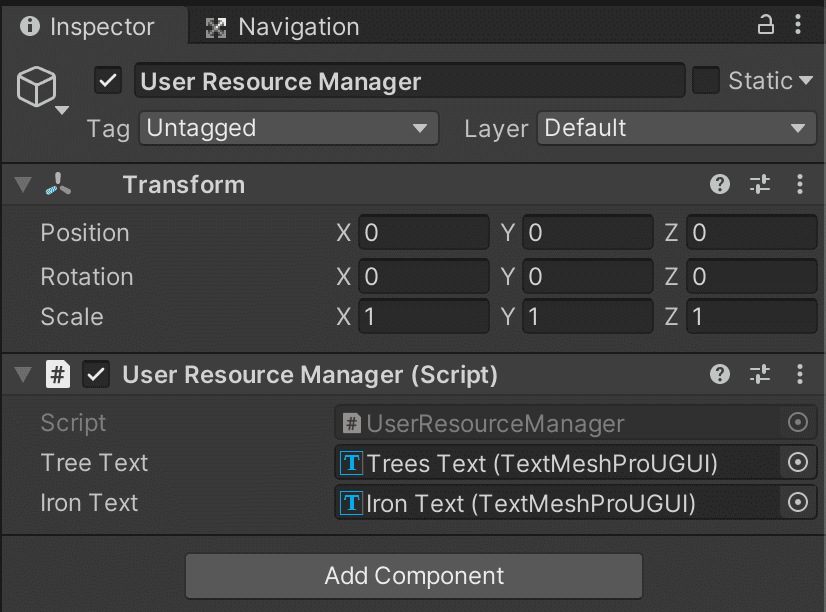
User Resource Manager
This is a helper script to visualize what type of resources are being collected by the player. It takes some TextMeshPro objects to display the information.
Camera Follow
Simple camera follow script that works great for a RTS game. Create an empty GameObject, attach the CameraFollow script, set some configurations as follow:
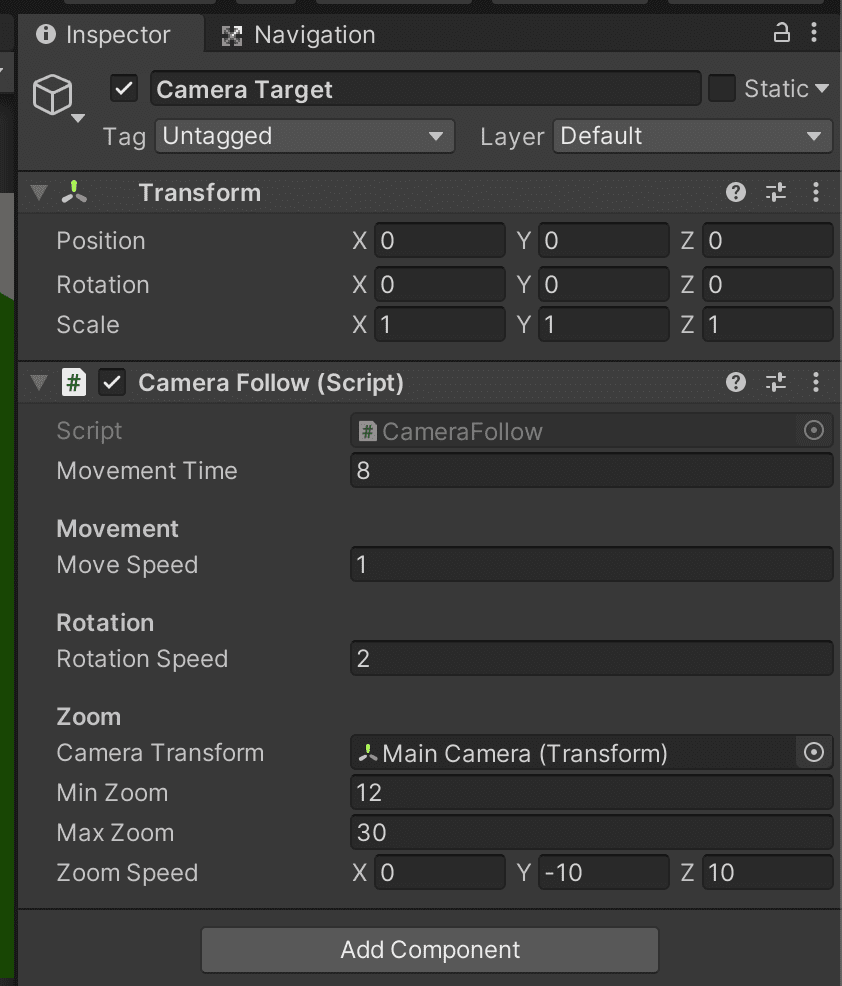
Now attach the Main Camera as a child of this new GameObject. Set the main Camera Transform as the Camera Transform and now you can move around using your WASD keys and Mouse.
Wrapping up!
Now you are set to start your own Real Time Strategy game! You can move around using your keyboard and mouse.
The possibilities of expansion are endless! For example, you can create a Terrain object instead of a plane to use as a ground. Play around with the elevation and place objects.
Thanks again for trying this starter kit! If you are curious about what else we have check more of our content in our Shop on the Asset Store!
For any further question not covered here feel free to contact us at support@berserkpixel.studio
